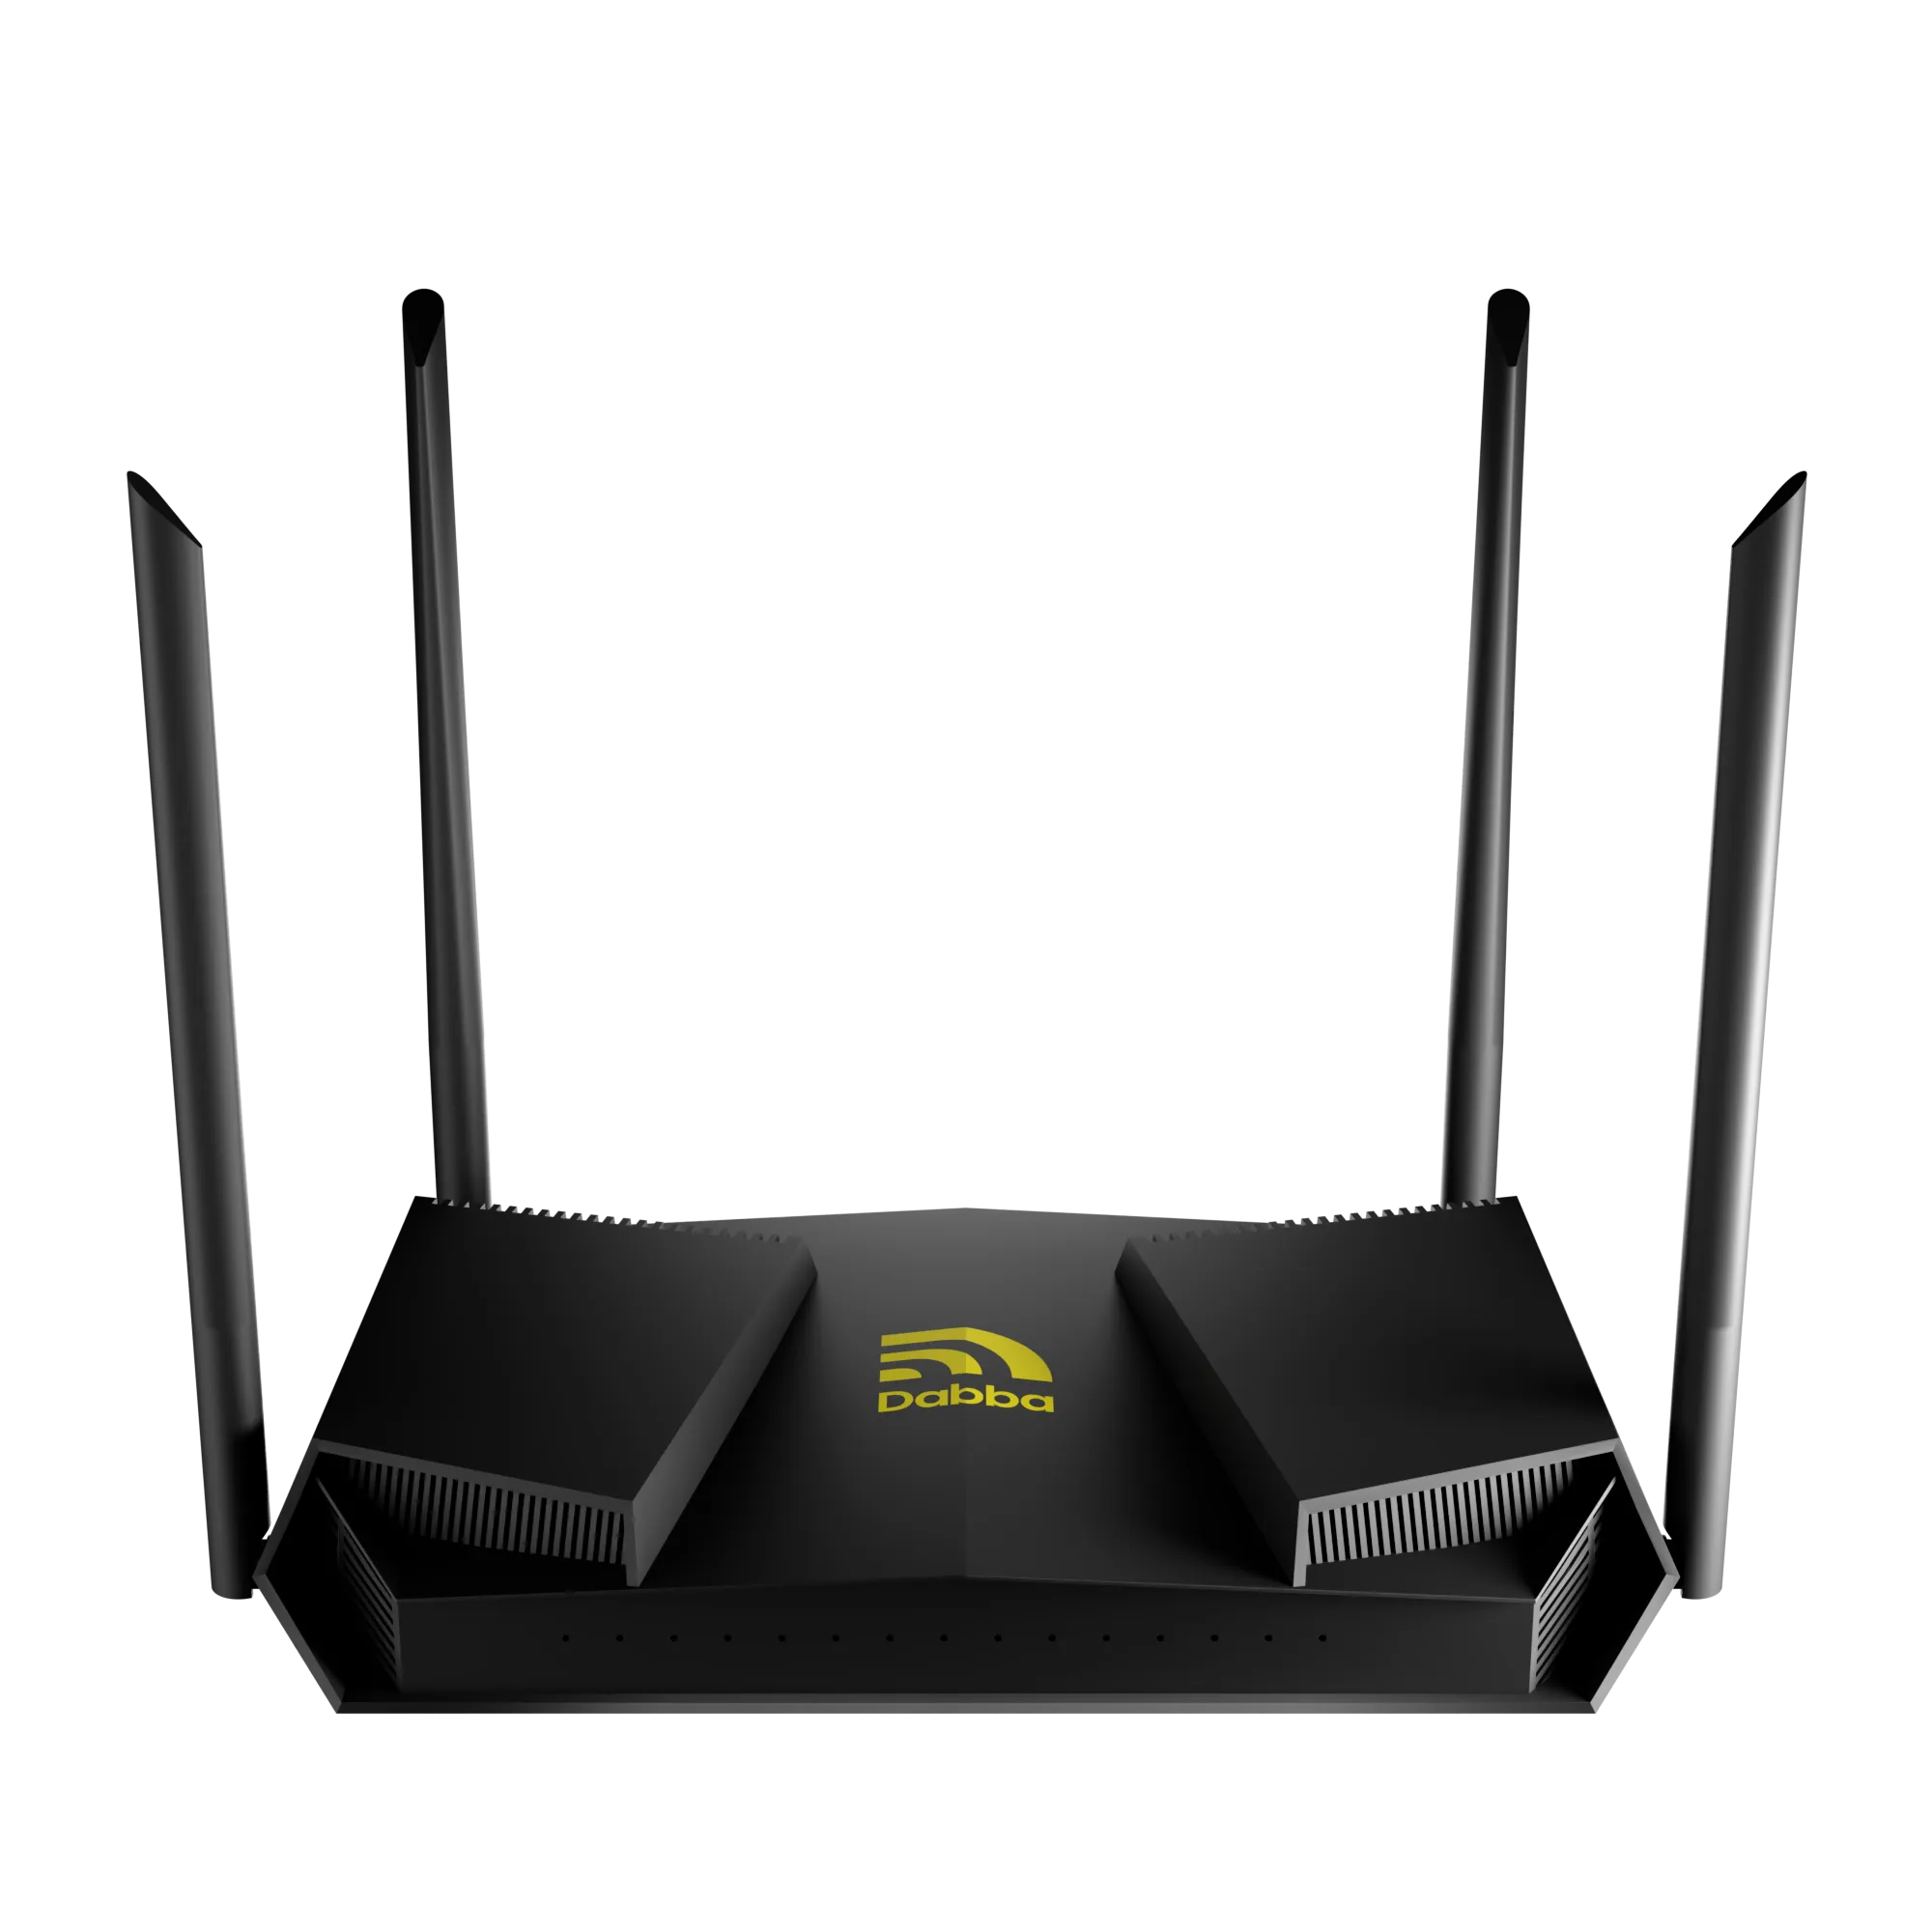
If you purchased your hotspots during Season 2, and have completed your KYC visit Dabba Onboarding and follow these steps:
Note: If you’re yet to complete your KYC, check this detailed guide: Dabba KYC – Step-by-Step
Also, before you proceed to Onboarding we recommend going though this checklist: Onboarding and KYC Checklist for Dabba Hotspot
Step 1: Connect Your Wallet
💳 Select “Connect Wallet.”
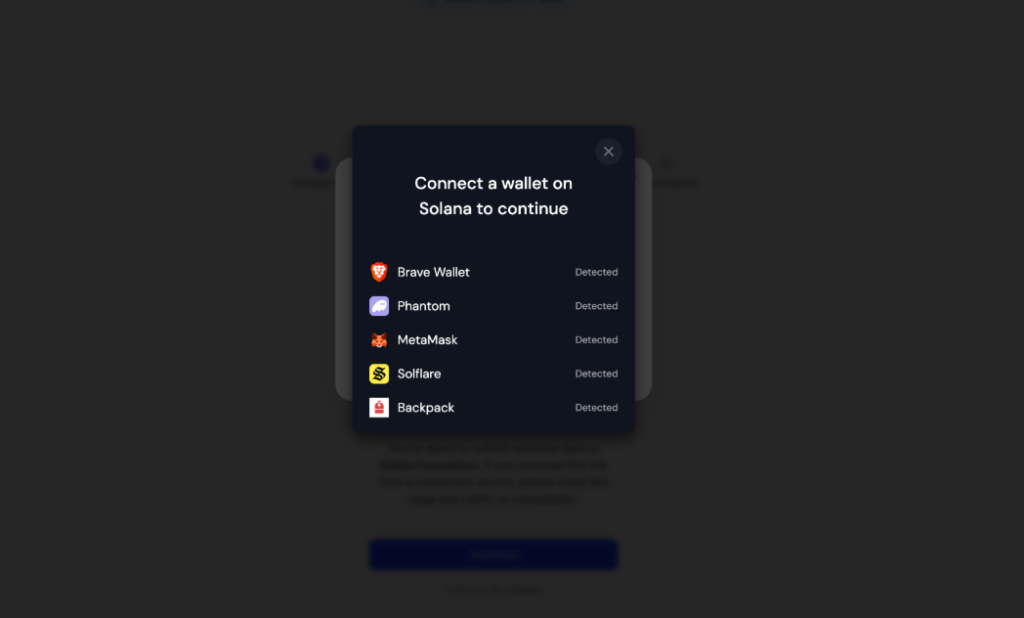
👉 Choose from multiple options (we recommend Phantom or Solflare).
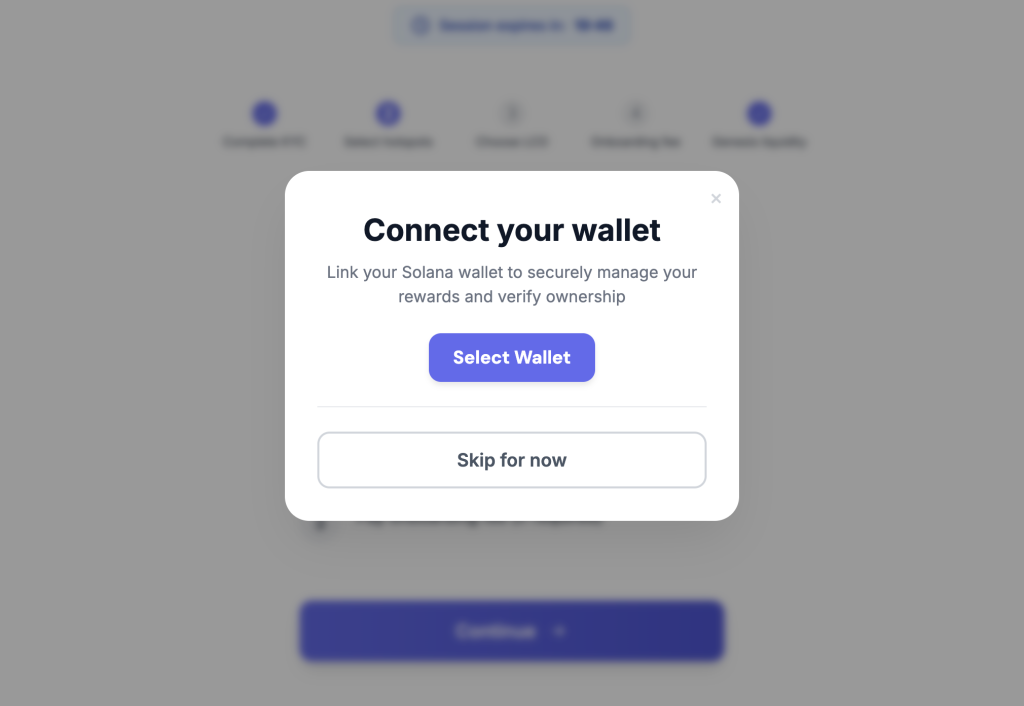
You get various wallet options to connect. We recommend connecting a Phantom or Solflare wallet.
Here’s a guide to create and setup a new Phantom wallet: How to Create and Setup a New Phantom Wallet
Step 2: Start Onboarding
✅ After connecting, click Continue.
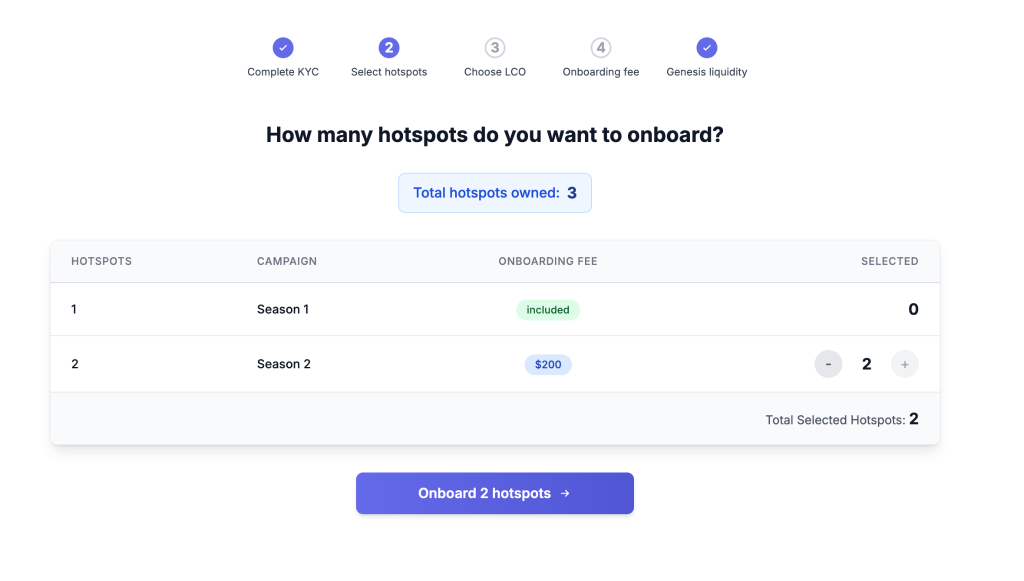
📊 You’ll see the number of hotspots you own.
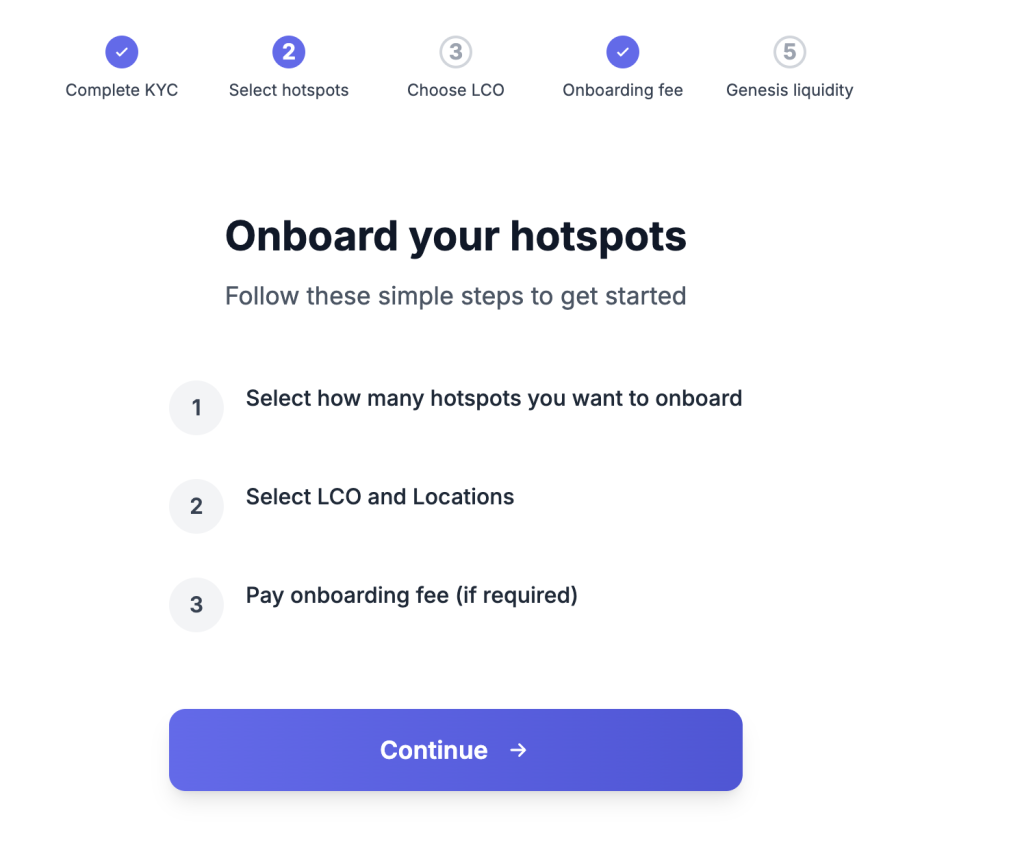
Once you continue onboarding, you’ll see the number of hotspots you purchased during Season 2.
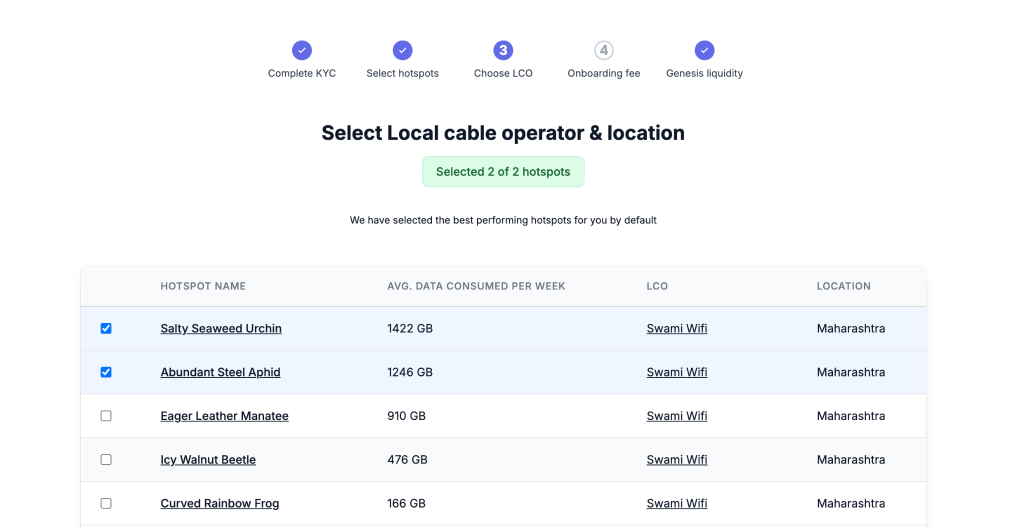
Step 3: LCO Partner and Location Selection
Once you continue to “Onboard Your Hotspots” you get to choose your LCO partner and location. By default, Dabba selects the best available Locations for your hotspots.
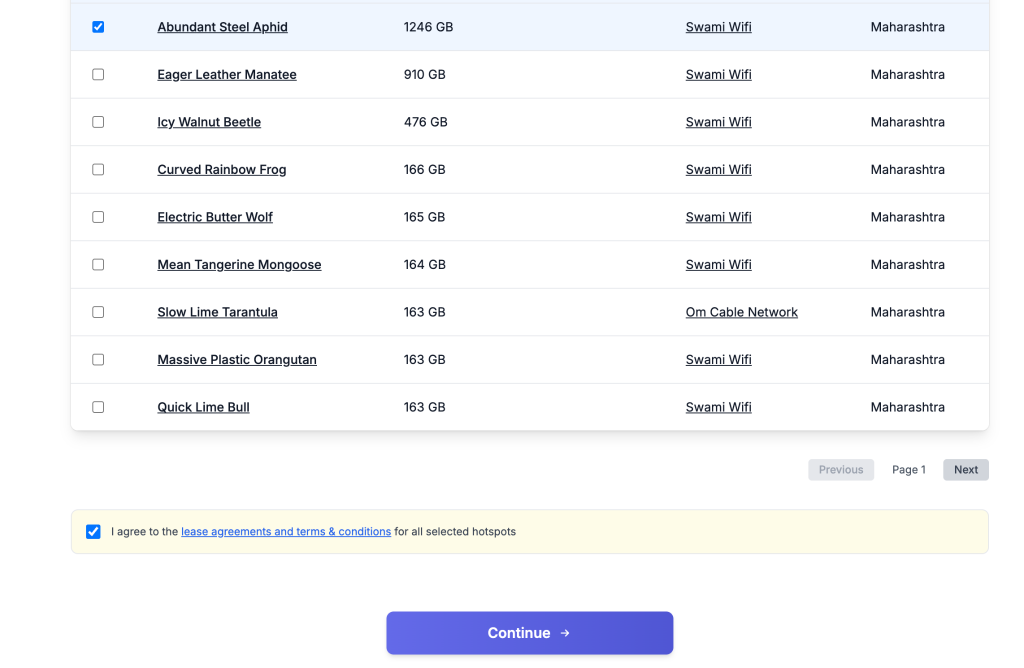
Once you have selected your LCO partner and location check agree to terms and conditions at the bottom and click continue.
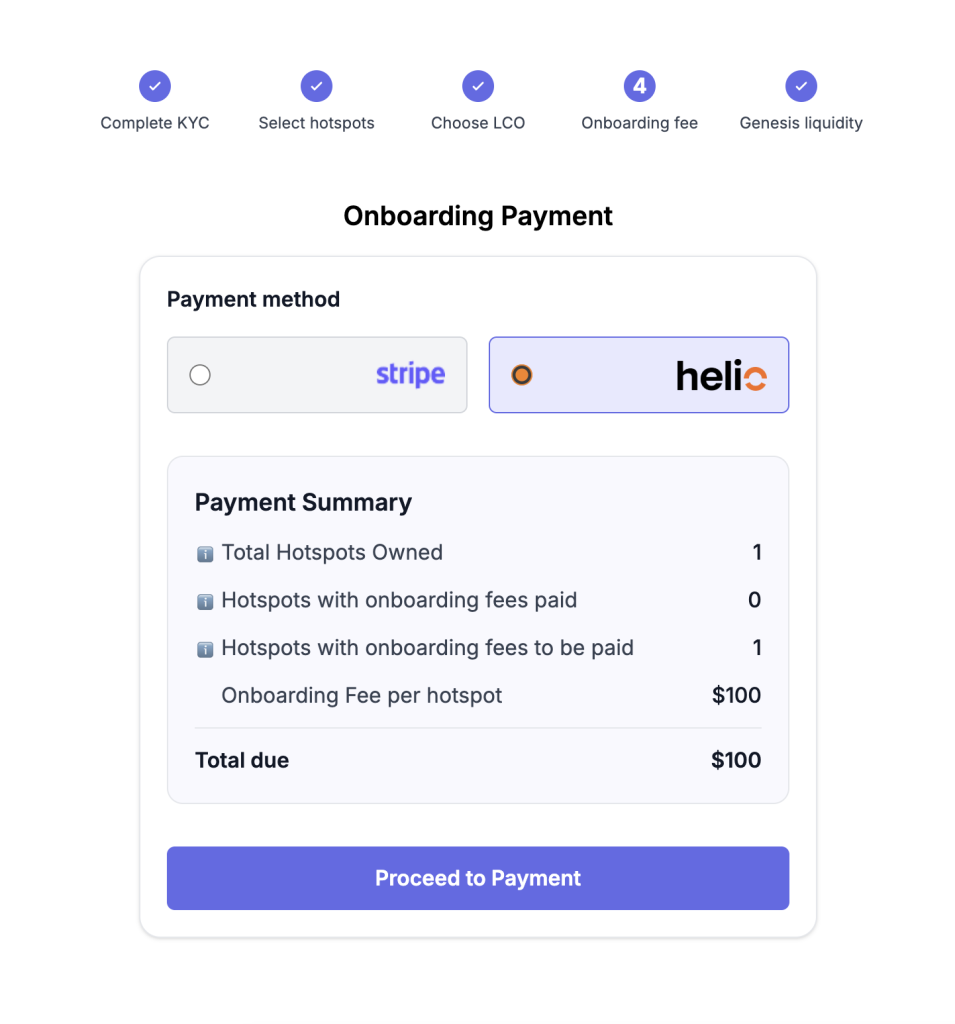
Step 4: Onboarding Fee Payment:
After you have selected your LCO partner and location you’ll be taken to the payment page for paying the Onboarding fee ($100 per hotspot).
Check your number of hotspots and amount to pay. You can select either Stripe or Helio for your payment processing.
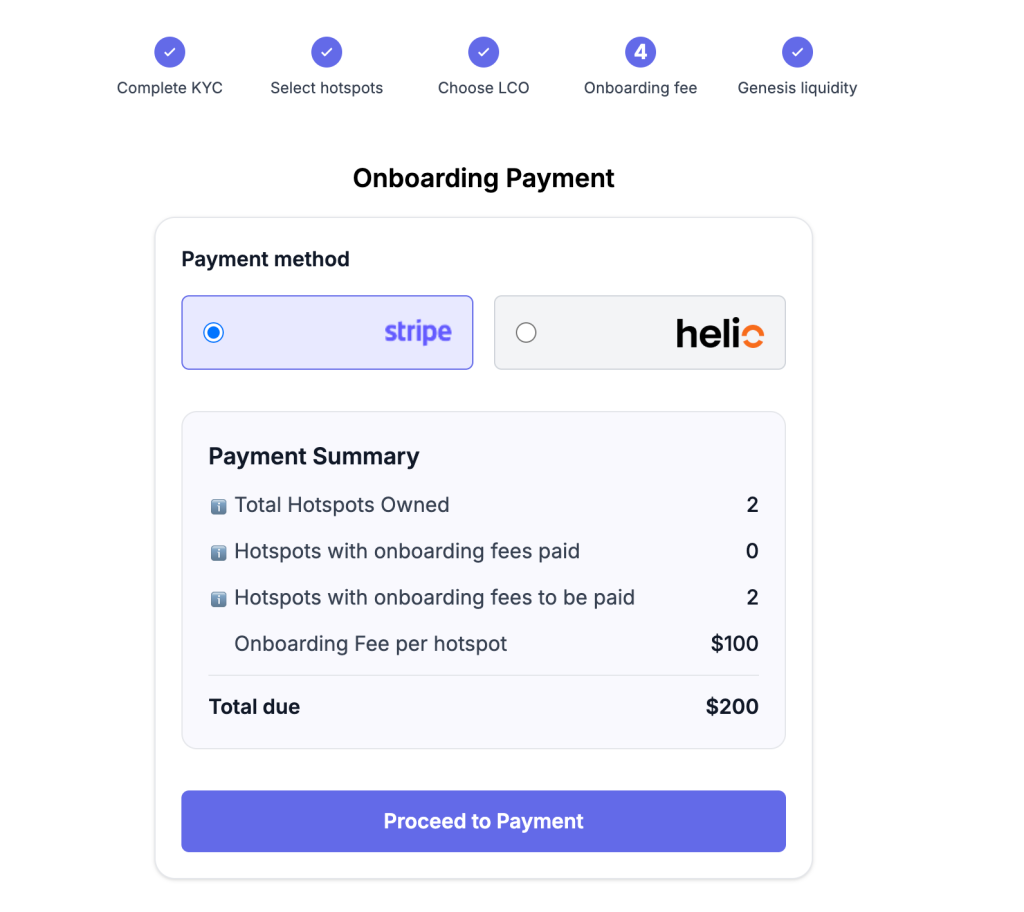
Once you’re ready click on Proceed to Payment. It will take you to the payment page.
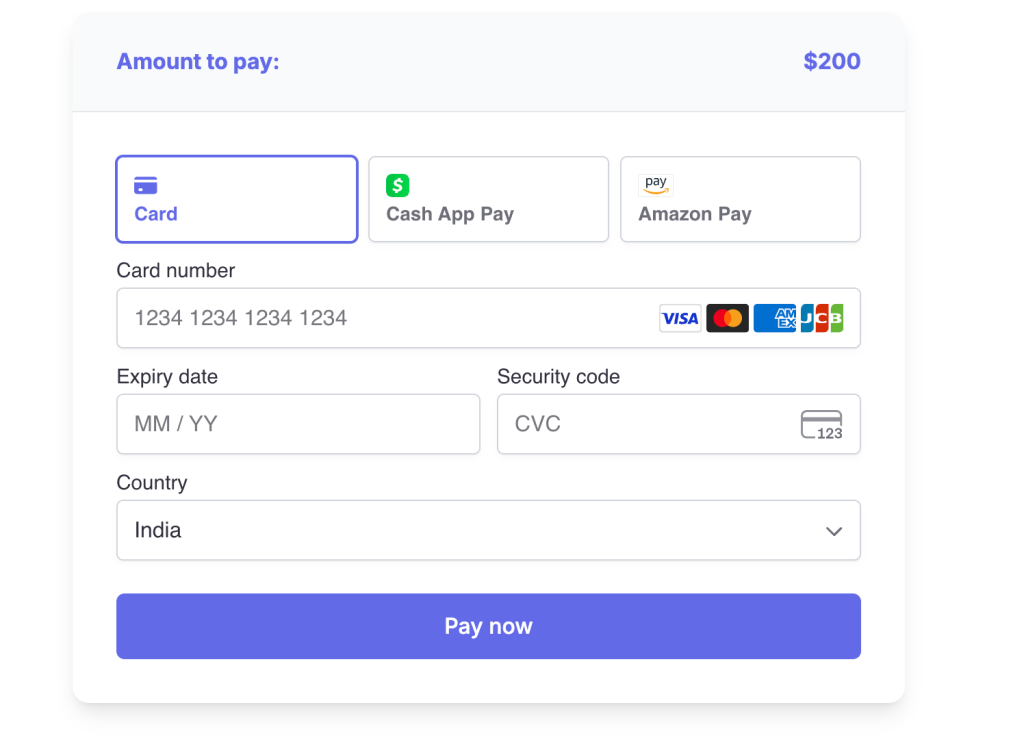
Fill in your payment details and click pay now.
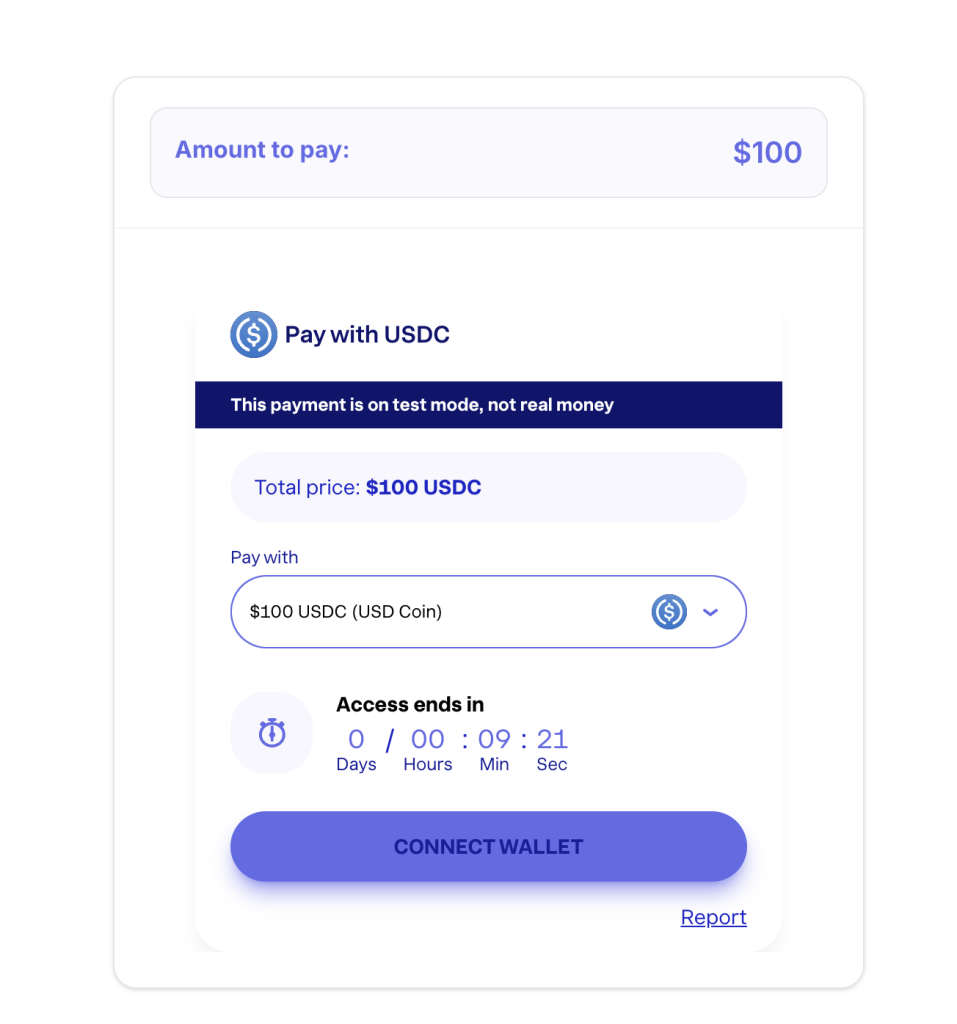
In case you want to make Onboarding Fee payment with Crypto follow these steps:
- Select Helio for payment!
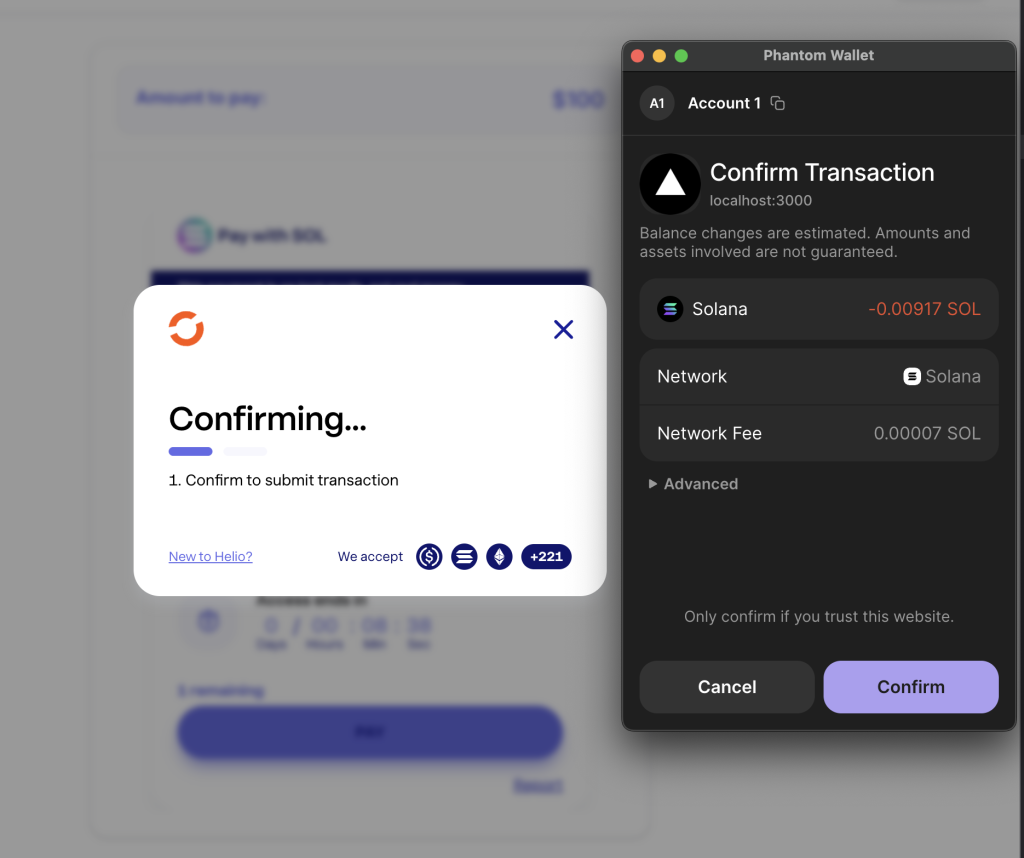
2. Once you select Helio and check proceed to payment, you get to see the payment details. And you’re asked to connect your wallet. Check connect your wallet to proceed.
3. Once you check connect wallet you’ll see multiple Solana-compatible wallets. We recommend using Phantom or Solflare.

4. Once you select your wallet, you’ll see the payment details.
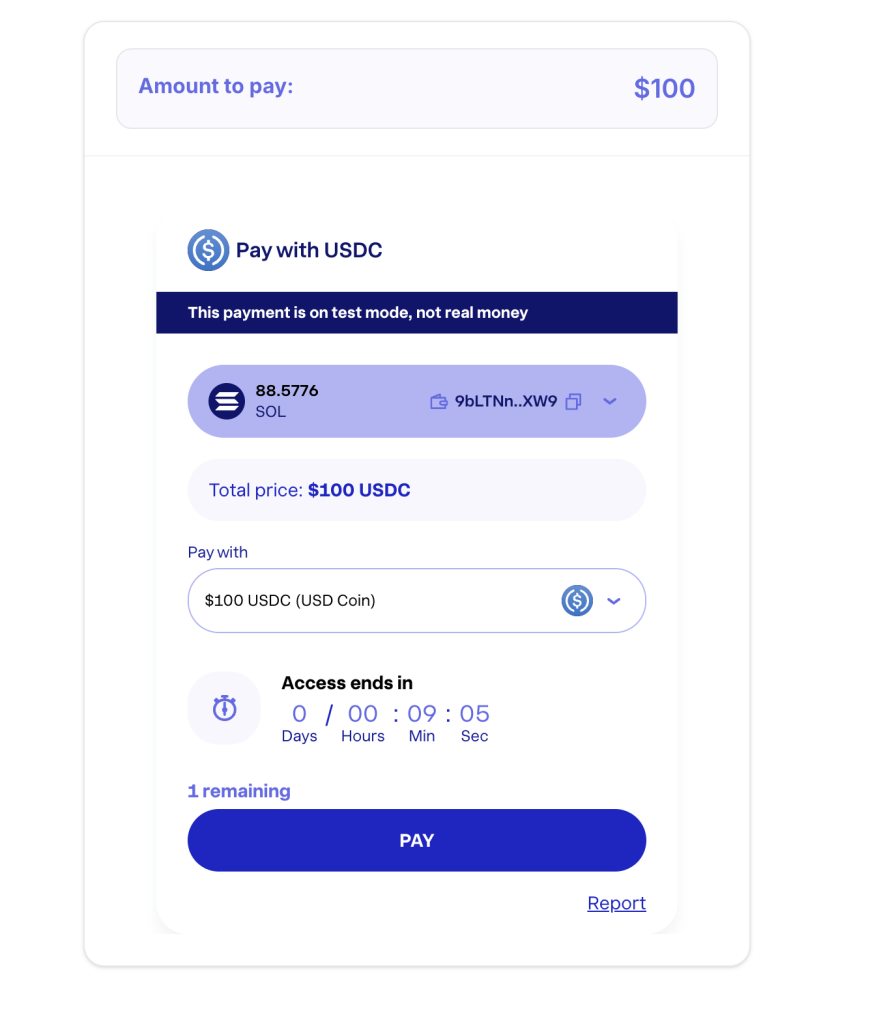
5. Once you select pay, you will have to confirm the transaction on your wallet.
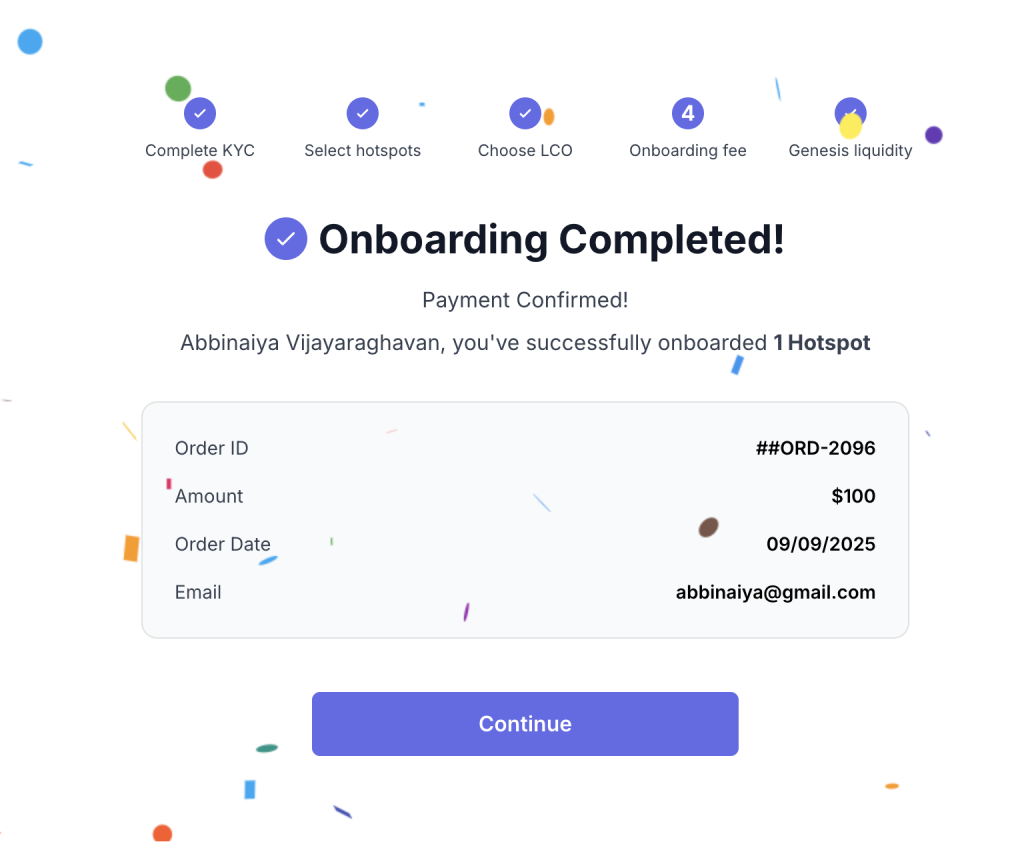
Step 6: Onboarding Complete
Once your payment is processed, you’ll see an onboarding completion message. Click continue to proceed to enroll in Dabba Genesis Liquidity Program.
Note: The following cryptocurrencies are supported for crypto payments:
- USDT
- HNT
- JUP
- HONEY
- SOL
- USDC
- BONK
Step 7: Final Check
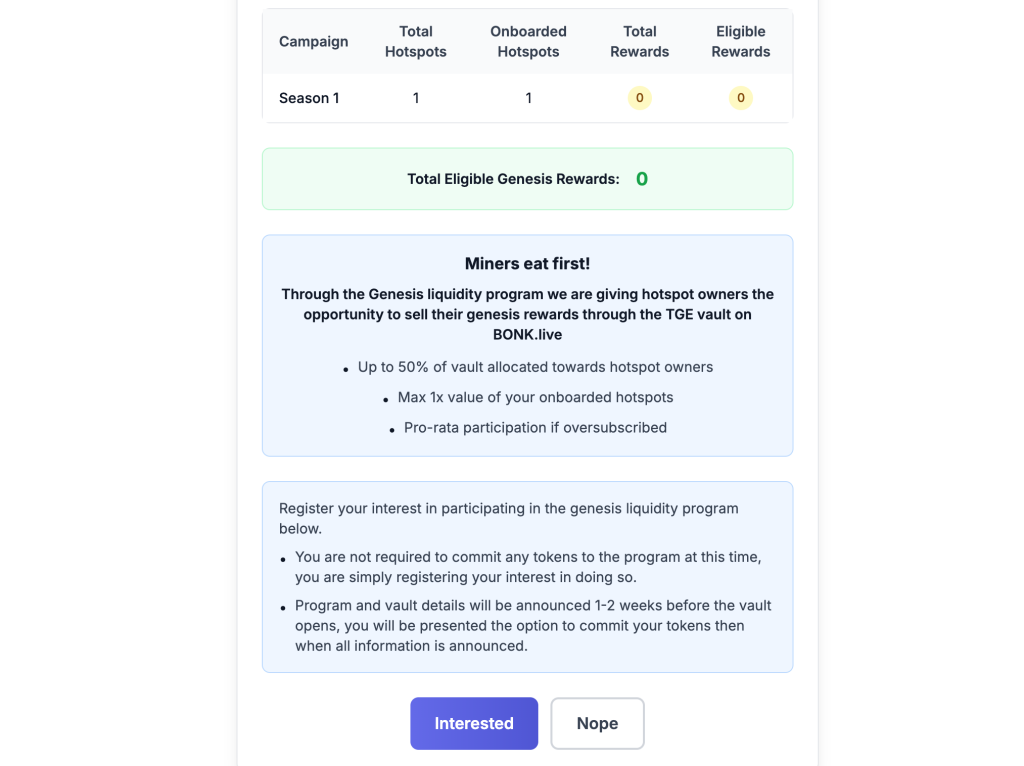
Here you will be able to see your total eligible rewards for Genesis Liquidity. Click Interested to join the Dabba Genesis Liquidity Program.
📩 Note: In test view, rewards may show as “Zero.”
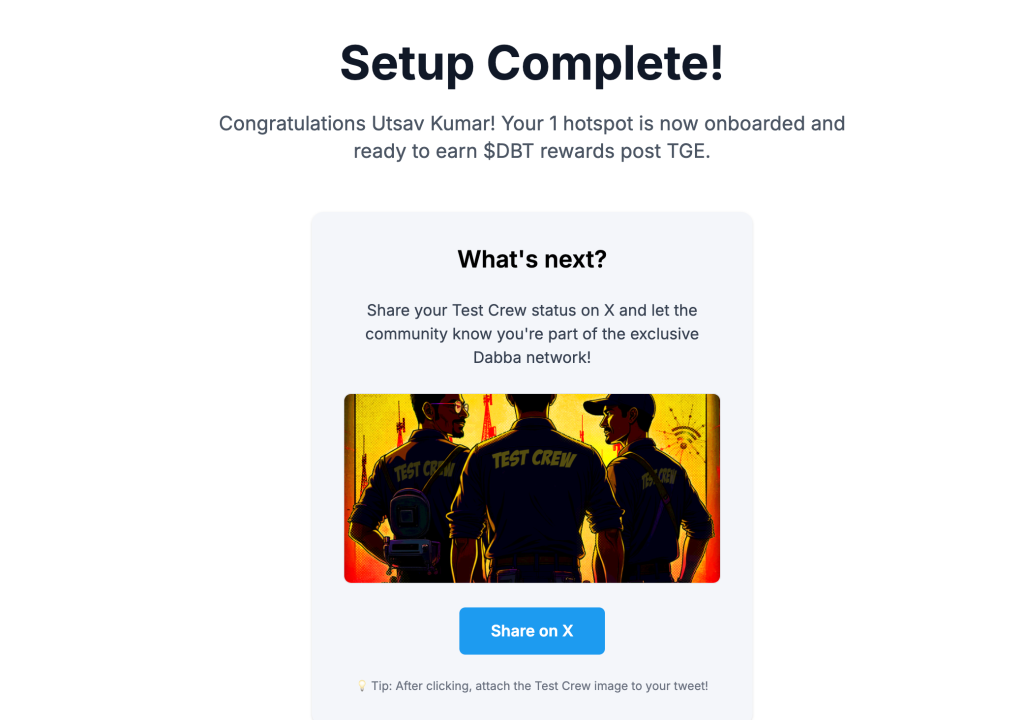
Step 8: Celebrate & Share 🎉
🚀 You’re officially onboarded & enrolled!
📢 Share your milestone on Twitter/X — let the world know you’re part of the next-gen internet revolution with Dabba.
If you purchased your hotspots during Season 1 or through campaigns check these:
- Onboarding guide for Season 1 Hotspot Owners
- Onboarding guide for Hotspots purchased through campaigns or received as Dabba Giveaways
Happy Onboarding!